Bartos Flur
A look at the trials and tribulations of learning assembly, and the process of the development of my first Synthesiser Module, the Bartos Flur - from concept to release.
The Bartos Flur was an interesting project I undertook. My Father runs a small business called Frequency Central which designs, builds and sells synthesiser modules. The Bartos Flur is one such module.
Background
During Summer 2013, he was designing a prototype for the Bartos Flur using discrete electronics, (ie. mostly window comparators, etc). The spec for the Bartos Flur is a module which outputs a trigger (short pulse) whenever the voltage rises or falls into one of 8 bands across 0-5V.
In the original design, it was found that there was a critical issue when processing squarewaves, and Frequency Central was having trouble solving this in the analogue domain. I was able to come up with a novel solution to this problem (using AND logic and delay to ignore the edges of a squarewave), but this caused the circuit to grow in size to the extent that it was no longer feasible as a product.
A new solution was needed.
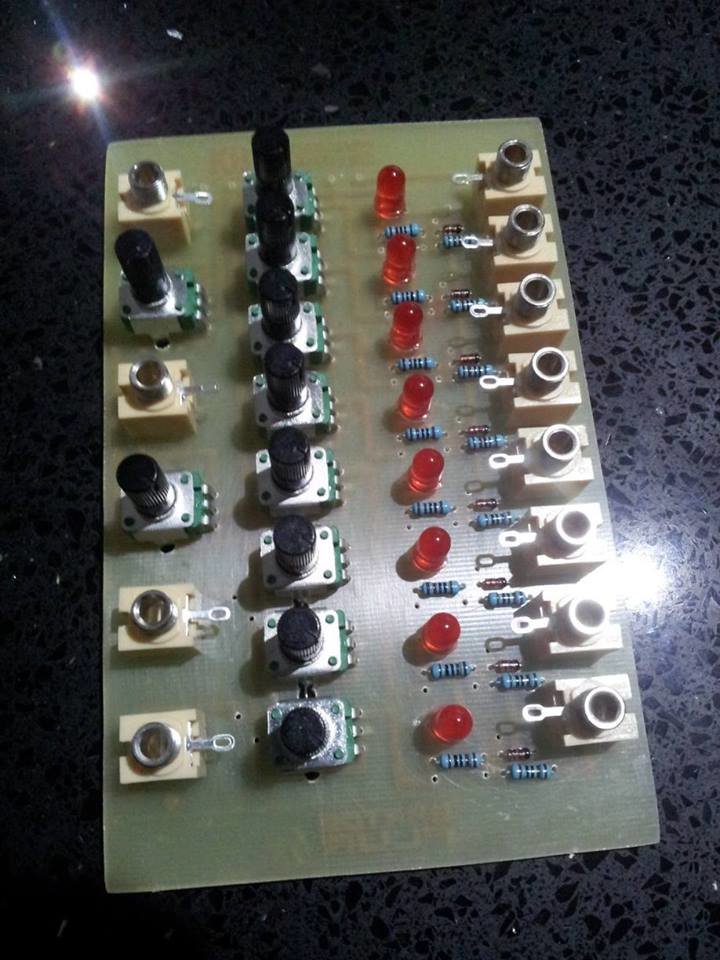 Frequency Central’s initial prototype
A-Level Electronics
At the same time, I needed to find a project to do for my A Level Electronics coursework, due Spring 2014.
We decided that it could be a fulfilling and ambitious project to try to condense the entire circuit onto a single PIC. Unfortunately, upon analysis of the requirements of the coursework, we initially assessed the Bartos Flur to not have enough ‘Sub-systems’ - (the coursework requires you to design 5), and so an extra feature had to be developed to purely so that I could meet the spec of the coursework.
This extra feature was another PIC connected to 8 attenuating variable resistors designed to quantise the voltage of the bands to semitones set by the variable resistors. We began calling this PIC the ‘QuaSH’ because it acted as a Quantised Sample & Hold, and whilst it wouldn’t be used with the Bartos Flur, we held on to the idea and in 2019 we decided to make a full module based around the concept.
 Electronics Project Bartos Flur
Learning PICs
Programming the Bartos Flur was a great challenge, and it really let me get my feet wet with PICs. I had used them briefly in the previous year of my Electronics course, but only for simple tasks such as flashing LEDs on and off in a pattern. No branching, logic checks, analogue reads, etc. Nothing special.
This project was like jumping in at the deep end!
As a beginner in both programming and electronics, I found it hard to even wrap my head around Microchip’s datasheets.
On top of figuring out how programming in assembly works (conditional branching!?), I had to learn how to interface with the PICs hardware.
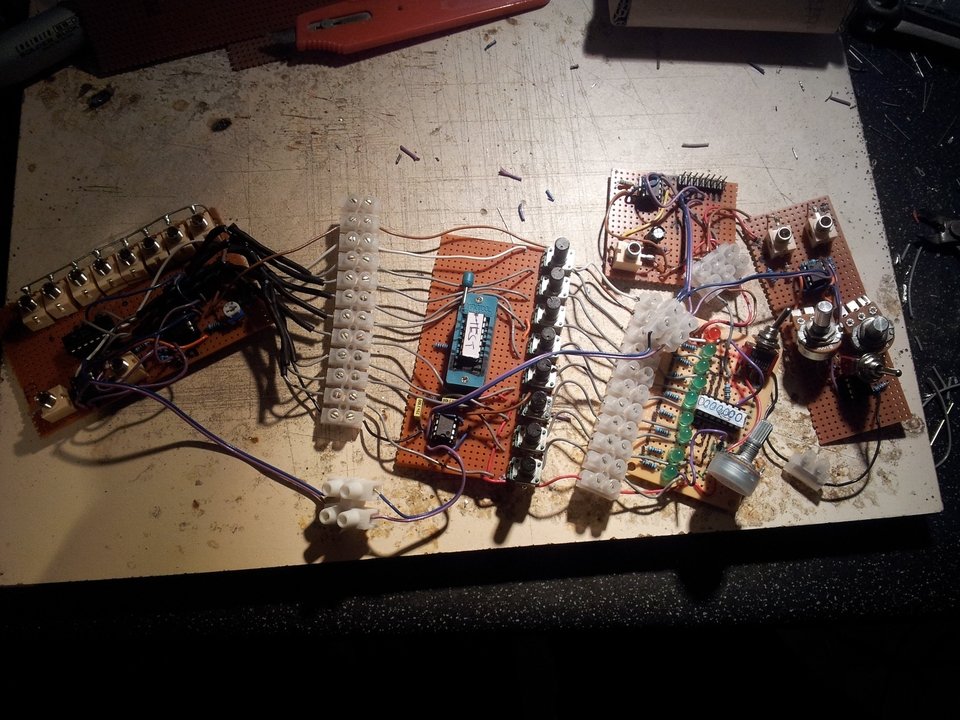
 Frequency Central’s prototype using my PIC
Implementation Issues
My initial attempt at analogue input was funny. I was reading from the wrong end of the byte, so there were 32 or so voltage windows rather than the desired eight. Once I figured out what the problem was, it was an easy fix, and the majority of the project ‘worked’ - all within a few days!
Unfortunately, it was far from bug free. Due to electrical noise, when the voltage was at the borderline between two windows, both corresponding outputs would flicker rapidly on and off, which was really problematic - it was basically unusable in this state.
I attempted to solve this problem in a variety of ways. My first attempt was using Hysteresis, which didn’t work too well, and unfortunately wasted a lot of my time trying to implement.
Later, I remembered the AND logic and delay solution that I had used to fix the problem on the analogue Bartos Flur (the solution which I mentioned briefly at the start of this article!), and devised a very similar solution in the code for the digital version.
The new system requires multiple samples of the same band before being accepted and outputting on that band.
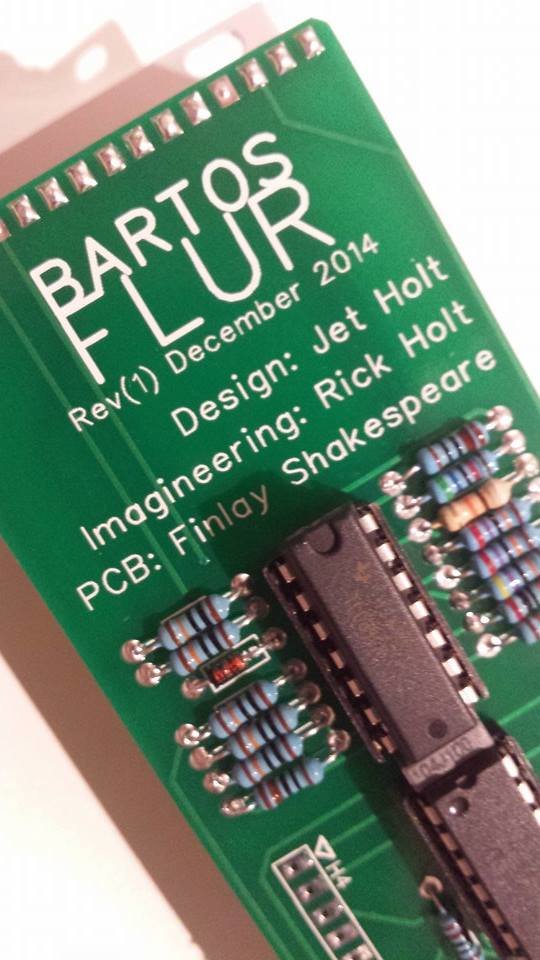 Bartos Flur Commercial PCB
Next I had to develop a solution for the Clock problem. The Bartos Flur essentially had three states for the clock - connected on; connected off; and unconnected.
Obviously, if you read the input directly, there is no difference between a 0V clock-off reading and a unconnected clock.
Fortunately, the sockets used by Frequency Central come with a ‘switched lug’, which allowed me to have a different default voltage if the clock was unconnected. To read the clock I now use an analogue input to determine state rather than a binary input.
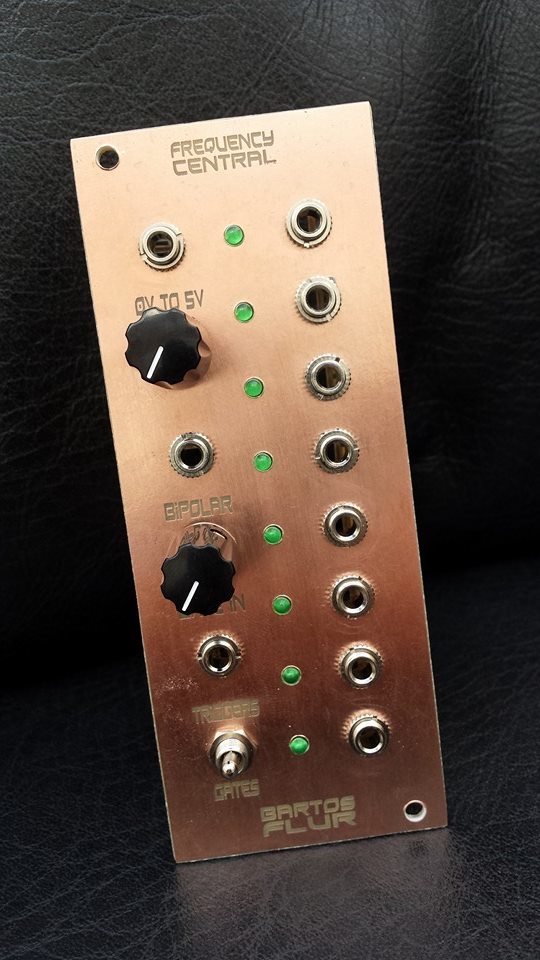
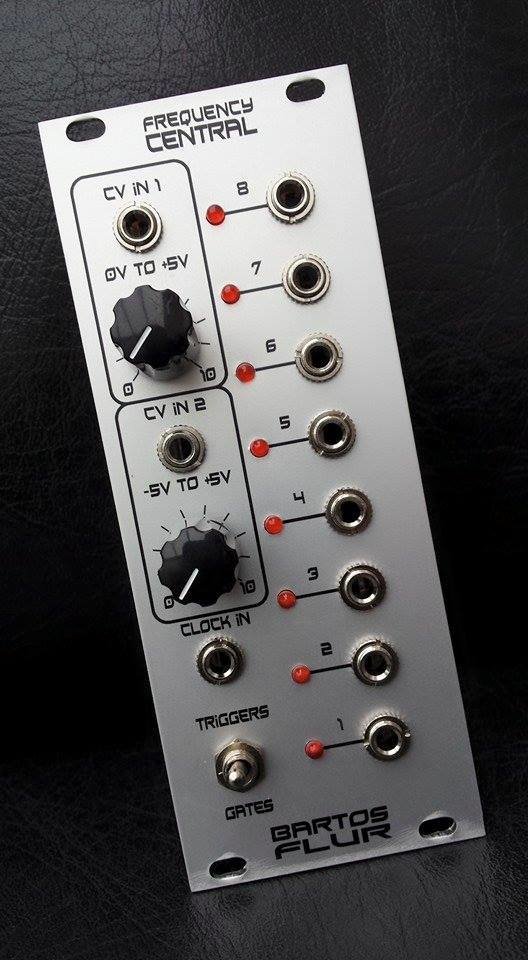 Bartos Flur Commercial Panel
Now that I was using two separate Analogue channels in my PIC, I encountered the second problem which I struggled with for a while.
The Datasheet for the 16F684 tells you that you must wait a certain amount of time between selecting a different channel and reading that channel. This is known as an Acquisition Delay and if you do not include one, you will get incorrect readings. I didn’t see this (RTFM!!) and so I was very confused as to why my clock read was accurate, but my band reads were not. Fortunately, three weeks before the deadline for my course I figured out the problem and was able to fix the issue.
Conclusion
The completed project worked just as well as the original analogue circuit. (better, actually, as it features optional ‘Gate’ (long pulse) functionality) Frequency Central was very pleased with the outcome. I was pleased too, because not only had I designed my first product, but I got full marks in my electronics coursework too, a grade that my teacher told me he had never given before (‘but perhaps only because the coursework used to be much more difficult’). I’m told he used my project as an example of a exemplary project in subsequent years.
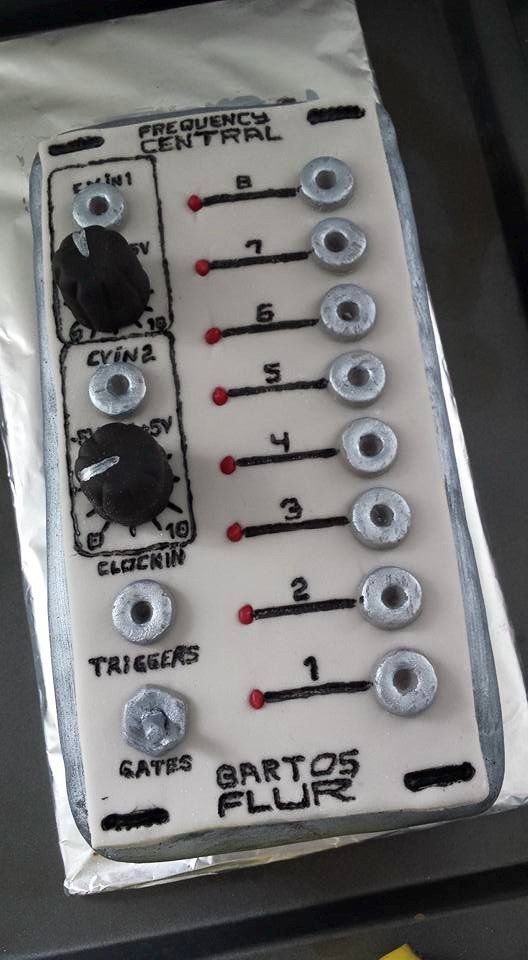 Bartos Flur Cake Edition
I rewrote some of the logic code in Spring 2015 in preparation for the commercial release, and the Bartos Flur was subsequently released for sale on 9th March 2015. It sold well, and I used my portion of the take to buy a laptop to use at University and to program even more modules for Frequency Central.
A revised version, Bartos Flur II, replaced the original in August 2018, and contained features from my design concepts that didn’t quite make it into the original. Bartos Flur II is available for purchase now.
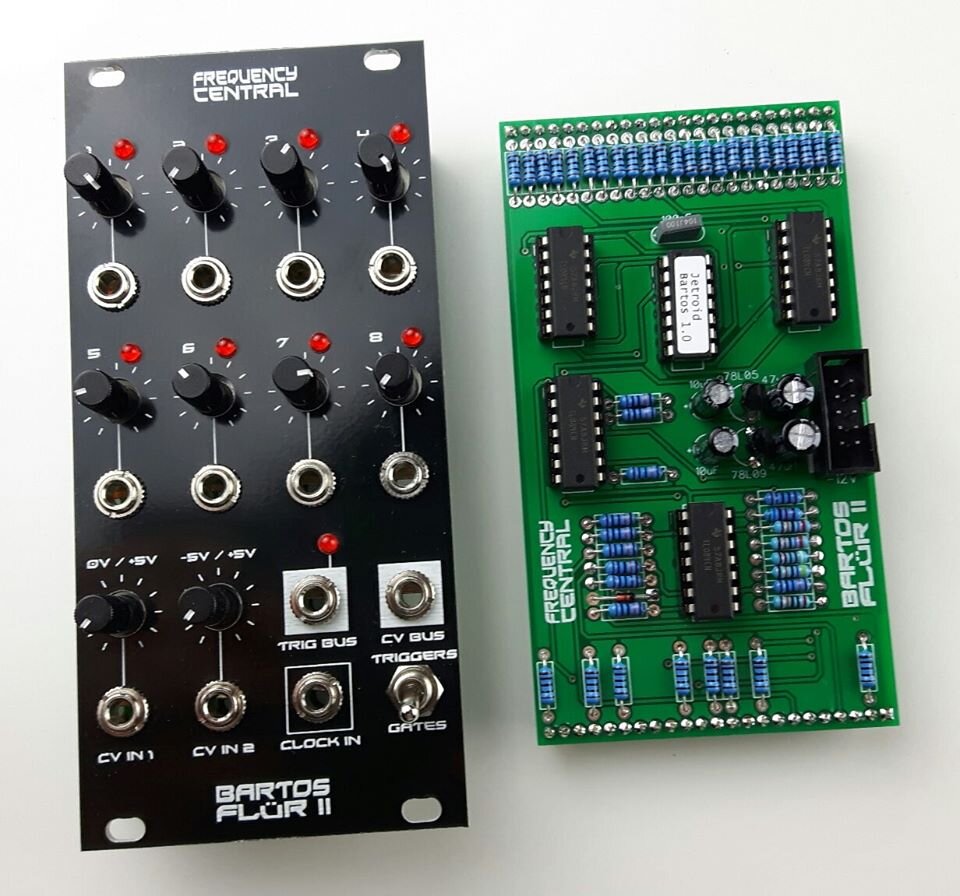 Bartos Flur II
A demo of the original Bartos Flur is presented below:
We later reused the concept of the ‘QuaSH’ subsystem to design a full module
P.S. I'm late to the party, but I recently got a twitter account that you can follow here.